
Here is a small collection of my favorite recipes, gathered over the years and shared in my monthly newsletters. Enjoy!
Drinks
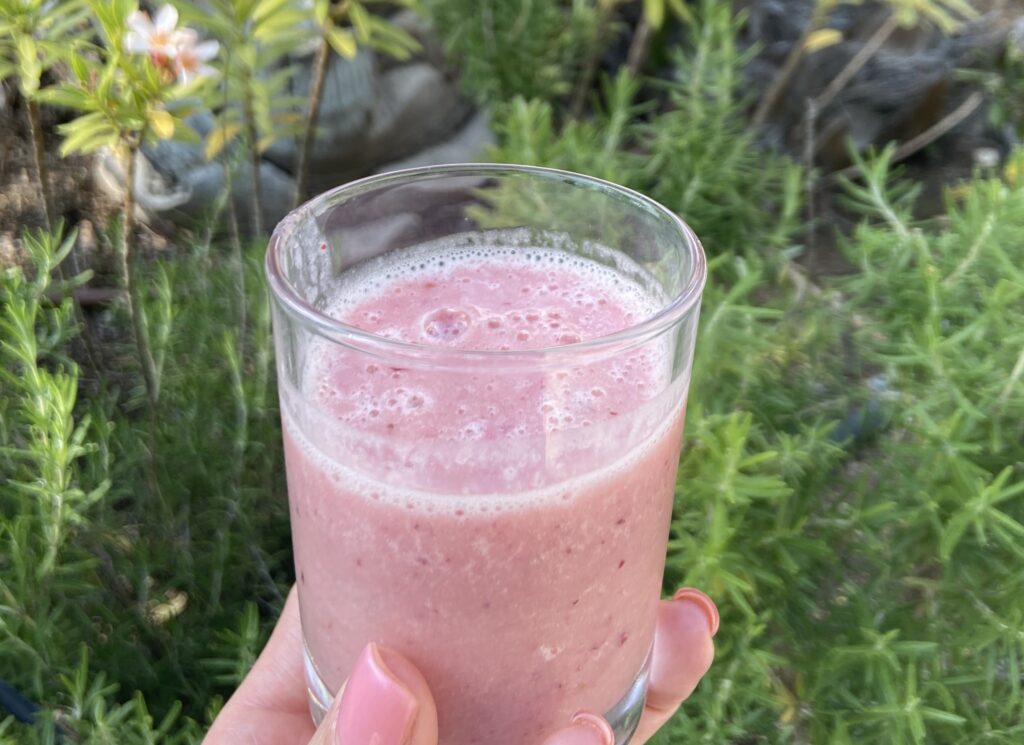
“Smooth your Sorrows” Pink Smoothie
My favorite retreat smoothie, with strawberries, banana and pineapple. Refreshing and tastes of vacation! Read about the special Cyprus retreat where this smoothie won out over the Gross Green smoothie.
1 cup frozen strawberries
1 cup frozen pineapple chunks
1 banana (room temperature)
¼ cup Greek yogurt*
½ cup fresh squeezed orange juice (or use additional milk)
1/4 to 1/2 cup milk (or oat, almond or coconut milk)
1 tablespoon fresh lemon juice (omit if using juice)
½ cup ice
Place all ingredients in a blender. Blend until creamy and frothy, stopping and scraping down the sides as necessary and adding the additional milk if necessary. Serve immediately or store in a covered jar in the refrigerator for 1 day.
Put your feet up and sip slowly, letting all your worries and sorrows smooth away.
Ginger Lemon Tea
Is there anything more warming than a good cup of tea? This ginger lemon tea is an excellent choice for fall and winter, great for cleansing and for your immune system. It is incredibly simple, warming, has natural anti-inflammatory properties, is good for digestion and aches and pains. It may even help you with those pesky foot cramps (studies show it helps women with menstrual cramps)! Read my blog about proper foot care in yoga.

1 inch of peeled and grated gingerroot
1/4 of a lemon
Raw honey (optional)
Fresh mint (optional)
Steep your grated gingerroot in boiled water for 5 minutes. If you don’t mind making more dishes, then strain the tea into your favorite mug and then squeeze and add lemon. If you are lazy like me, leave it all in the mug, grated ginger and chunk of squeezed lemon, and drink up! For those that need a little bit more sweetness, you can add a wee squeeze of raw honey – honey is quite soothing and can actually help you sleep, so this could be a good choice for evening. If you want to brighten it up even more, add a couple of fresh mint leaves.
Sleepytime Cocoa
Inspired by and adapted from Dr. Aviva Romm’s cocoa recipe, I’ve modified this to suit my tastes.
There’s nothing quite like cozy drinks in the winter, and cocoa is one of my favorites. My kids, even the teenagers, excitedly wait for the weather to cool for us to partake. This winter has been cold and rainy, and opportunities abound for hot cocoa.
But what works for the kids is a pre-made sugary mix. I am looking for something more satisfying, less “junk-y,” and to introduce some healing and beneficial elements.
In this recipe, I add a bit of reishi mushroom powder and ashwagnda powder, two adaptogens*, to make this an enticing evening treat. It can serve as a dessert after dinner, and to help you begin to wind down into a cozy, winter evening routine.
For more information on sleep hygiene and how yoga can improve your sleep, read my blog post on the subject.

1 ½ cup soy milk or other milk alternative
½ tsp reishi powder
1 tsp ashwaganda powder**
2 tbsp cocoa powder
2-3 tsp silan (date honey)
1 tsp vanilla
Ground cinnamon
Ground cloves
This makes a pretty thick conconction for 2 small mugs. If you’d like a thinner cocoa, add more milk 😉
Combine soy milk, reishi powder, ashwaganda powder, cocoa powder, silan and vanilla in a medium saucepan. Whisk together over low to medium heat, being careful not to let the milk boil over.
Once the milk and powders have combined into a smooth texture, and the cocoa is heated through, you can remove it from the heat and pour into your mugs. Sprinkle on ground cinnnamon and cloves to taste.
Enjoy your Adaptogen Cocoa and Sweet Dreams!
*Adaptogens are the “Kings” and “Queens” of herbal medicine that help us restore balance to our body’s stress response system.
Reishi mushroom is an adaptogen that is known for supporting the immune system and giving adrenal support, helping to calm and relax you and can help you sleep. Ashwaganda has over 4,000 years of traditional use in India. It is soothing and anti-inflammatory, and used to improve sleep.
**A couple of cautions with ashwaganda, though it is very safe: not for use during pregnancy, avoid if you are sensitive to nightshades, and if you have hyperthyroidism, use caution as it can increase thyroid production, potentially making your situation worse.
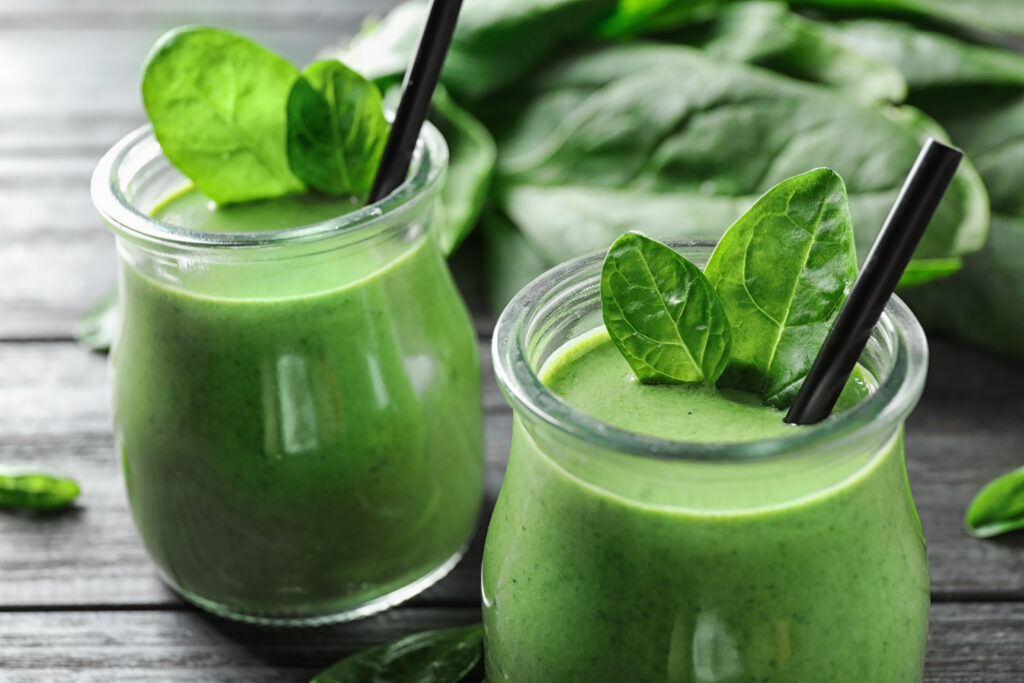
Get Your Greens On – Green Smoothie
If you are a smoothie girl, you probably already have your own favorite green smoothie in your repertoire. I really like this one because it is sweet enough for me, and the matcha tea gives me that extra little caffeine boost I like in the morning.
1 1/2 cups unsweetened almond milk
2 cups spinach
1 frozen banana
1 pear, cored
1/2 teaspoon matcha tea powder
1 scoop of protein powder (optional)
Combine all the ingredients in your blender, starting with the almond milk first, then spinach leaves, then fruit and powders. This layering helps the blending to go smoothly. After all, that’s the point! Blend to perfection and Enjoy!
Summer Smash Berry Mint Mocktail
I love the elegance and fun of a cocktail, but don’t always want the alcohol. These mocktails are great anytime…they are so refreshing and feel fun and flirty. They are also healthy, with a nice antioxidant burst of berries, sweet mint, and effervescence from the sparkling water. This recipe is for an individual serving, but you can also make up a batch and enjoy with friends!

1 handful of mixed berries (fresh or frozen, but if using frozen, allow them to defrost enough so they are soft but still cold)
5-6 mint leaves
1 oz lime or lemon juice
1 tbls agave nectar or honey
Ice
Soda/seltzer water or sparkling mineral water to taste
In a cocktail shaker or tall glass, muddle the berries and mint.
Add the lime juice, sweetener and ice, and shake until well combined. If you don’t have a shaker, you can pour back and forth between two glasses until well combined.
Strain the mixture over ice and top with the sparkling water.
Garnish with mint and a couple of berries. Put your feet up and enjoy in a pretty glass!
Soups
Autumn Orange Soup
This is one of my most nourishing soups, truly, inspired by the wholesome soups from my Cornucopia cookbook. This gorgeous vegetarian cookbook is based on the Dublin vegetarian restaurant of the same name (Cornucopia). It is not made from oranges, but is named such for the beautiful color of the soup. I am a genuine soup lover, and this is one that always makes me and my family feel better. We especially love it with a generous chunk of sourdough olive bread.

Serves 8-12
1 Large Butternut Squash, peeled, seeded and cubed into 1/2″ pieces
Olive oil to toss the squash with and enough to cover the base of your soup pot
Salt (I love coarse sea salt for this) and Pepper to taste
1 Large Onion, chopped roughly about 1/2″ pieces
2 Stalks of Celery with leaves, chopped roughly
5 Large Carrots, chopped roughly
1 Large Leek, chopped roughly
1 Large Sweet Potato, peeled and chopped into 1/2″ pieces
1 Cup of Red Lentils, rinsed
8 cups of water, plus another for thinning if necessary
1 Small Bunch of Sage or Parsley
Pumpkin seeds (optional)
Preheat your oven to 200C/400F, on convection mode if you have it.
Toss your cubed butternut squash with a bit of olive oil, some coarse sea salt and pepper. Lay it on a baking sheet lined with baking paper and pop it in the oven for about 30 minutes. The squash should be slightly browned and fork soft when done. Try one…it should be slightly sweet and absolutely delicous.
Meanwhile the squash is roasting in the oven, pour a generous amount of olive oil into your large soup pot. Enough to just barely coat the bottom of the pot. Turn your burner on to medium heat and add the rest of the vegetables to the pot (onions, celery, carrots, leek, and sweet potato). Stir it around and coat all the vegetables in the oil…they should be sizzling a bit. Once they are all coated with oil and nice and hot, lower the temp, cover the pot and let it all sweat for about 10-15 minutes. This is called a mirepoix, when you make a flavor base by cooking the veggies in this manner.
Then, add your 8 cups of water and rinsed lentils to the pot. Stir, turning the heat up and bring to a boil.
Cover the pot and lower the heat to a simmer for about 30 minutes or until the lentils have lost their shape.
By now, your squash should be done and you can add the whole batch to the pot (that is if you haven’t snacked off a bunch of them).
Add a teaspoon of salt and 1/2 teaspoon of pepper at this point. With an immersion blender, begin blending the soup. You may need to add more water if it’s too thick.
Once it is well blended, add your herb of choice and blend some more. Check for seasoning and add more salt or pepper as necessary.
Garnish with some pumpkins seeds for a little extra zinc and seasonal fun!
This soup is very hearty but a little sweet, so serve it with some crusty, savory bread and a nice, bitter greens salad to complement the flavors.
Yummmmm.
Bone Broth Chicken Soup (not for vegetarians!)
Chicken Soup, aka Jewish Penicillin, is truly a panacea for what ails you. Part of the magic is the long cooking time of the bone-in chicken, which breaks down the collagens and minerals and releases some of the marrow of the bone. There are numerous benefits with all these vitamins, nutrients and minerals that reduce inflammation, support your gut health, protects the skin and joints and can boost immunity.
I make bone broth regularly in the winter months and reserve it for use in other recipes, and if I make a full roasted chicken, I boil the carcass for a day or so to use the bone broth in my chicken soup as an extra boost.
In this recipe, I am making a traditional, simple chicken soup with skinless chicken parts. I suggest making it first thing in the morning, so that it cooks all day. The longer, the better.

Whole chicken, skinned and cut into 10 pieces (use of neck is up to you! ;))
Enough water or bone broth (or combination) to fill pot 3/4 full
5 carrots, peeled and chopped into 1″ pieces
1 large onion, peeled and chopped into 1″ pieces
2 celery stalks, chopped into 1″ pieces
2 parsnips, peeled and chopped into 1″ pieces
1 large turnip, peeled and chopped into 1″ pieces
2 large zucchini, chopped into 1″ rounds
Salt & pepper to taste
Parsley and/or dill, small handful chopped (optional)
Take your largest soup pot and fill it 3/4 way with water or bone broth. Bring to a boil. Place the chicken parts into the boiling water and cover, bringing to a boil again. Lower the heat and cover, simmering for about an hour.
At this point, I like to add the carrots, onion, celery, parsnip and turnip. Back to boiling, then simmer for another few hours.
Check the level of the water, adding more broth or water if it is getting a bit low. I add salt at this point, but not yet pepper.
Continue simmering all day, occassionally checking the level and adding water or broth as necessary. It is ok for the broth to reduce; it will concentrate and get more and more delicious over time, but you don’t want to boil off all the broth!
About an hour or so before serving, I add the zucchini. Once the zucchini is cooked and soft, I check for salt and add pepper, about 1/2 teaspoon.
I love fresh herbs, so I add them just minutes before serving so they green up and freshen the taste.
You can also make matzah balls or add some pasta for Chicken Noodle Soup.
Serve hot and enjoy!
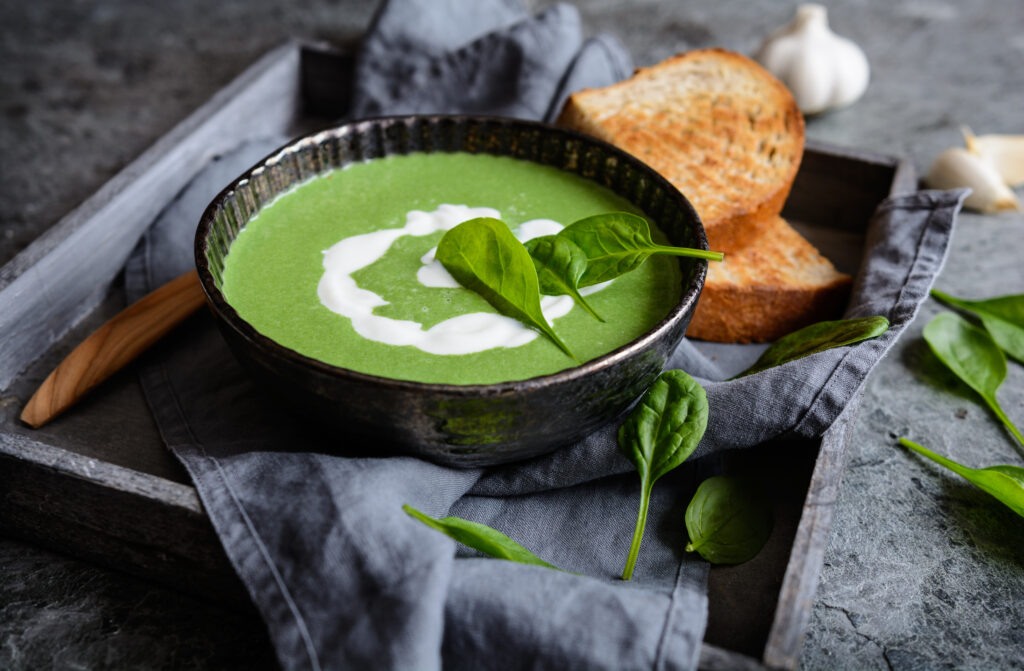
Creamy Spinach Soup
The creamy smoothness of this soup is perfect for winter, kids and adults love it, and it is a wonderful way to get a healthy serving of our greens. I often serve this soup at my winter workshops, as it nourishes us from the inside and is so simple and delicious.
1 large yellow onion, peeled and chopped roughly
2 stalks of celery with leaves, chopped roughly
1 large carrot, peeled and chopped roughly
1 leek, chopped roughly
4 cloves of garlic, chopped roughly
olive oil or grapeseed oil
4 medium yellow potatoes, peeled and chopped into 1″ chunks
5 cups of water
1 large handful of frozen peas
400 grams of fresh baby spinach
100 grams of cooking cream, or to taste (or soycream or coconut cream to make it non-dairy)
1 tsp of salt, pepper and nutmeg (optional)
Roughly chop the onion, celery, carrot, leek and garlic. In a large soup pot, coat the bottom with oil and warm over medium high heat. Make a mirepoix by adding the chopped veggies and saute to thoroughly cover the vegetables in the warm oil. Cover the pot, lower the heat and let the vegetables sweat it out for about 10-15 minutes, stirring occasionally.
Meanwhile, prepare your potatoes. Then, add the potatoes, 5 cups of water and frozen peas to the pot. Bring to a boil, cover and simmer for about 20 minutes or until the potatoes have softened.
Once all the vegetables are fork tender, add the spinach in slowly, stirring so that all of the spinach can cook easily. This will take maybe one minute. Remove from the heat once all the spinach is green and wilted.
Using an immersion blender, blend the soup and add in your cream and spices.
You can serve this as is, or with a dollop of sour cream and squeeze of lemon juice or some chopped nuts on top.
Enjoy the warmth of this brilliant green soup!
Salads
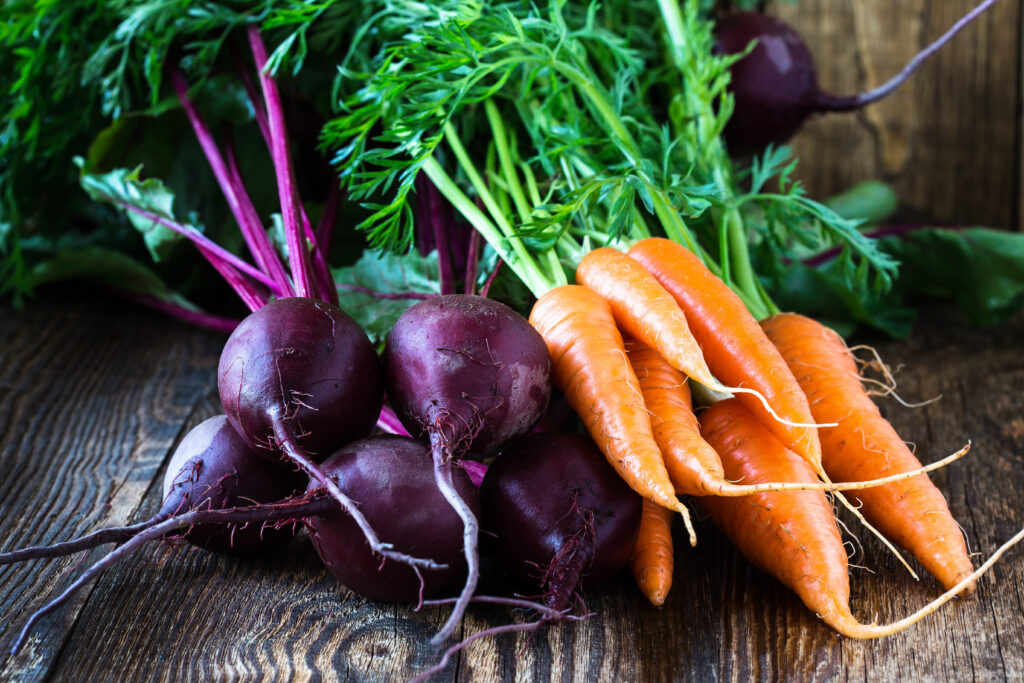
Bright Beet Salad
This is a very simple, raw salad with just a few ingredients and boy does it pack a punch! I love how crunchy and zesty it is, and my whole body feels better after a serving. The combined health benefits of beets, carrots and garlic are tremendous, including lowering blood pressure, improving brain health, strengthening bones, alleviating inflammation and boosting your immunity. Take a quick google of their health benefits and your mind will boggle. 😉
It doesn’t get simpler than this, but two warnings – 1) raw beets stain, and 2) raw garlic is pungent, so use more or less depending on your tastes
Serves 2-4
1 large beetroot, peeled and chopped into bite-size pieces
1 large carrot, peeled and grated
1 clove of garlic, peeled and minced or pressed into a garlic press
1/2 lemon, squeezed for its juice
salt and pepper to taste
Combine all the ingredients in a small bowl, stir to combine and allow about 10 minutes for the flavors to mingle. Enjoy!
Fall Kale Salad with Apples and Fennel
I surely love cooked vegetables this time of year, but I still crave certain salads to go with my cooked meals. This is a great salad, delicious, packs a nutritious punch, and gives me that crunch for texture. Further, it keeps so well, even after it is dressed, that I can make plenty and store some leftovers for another time.
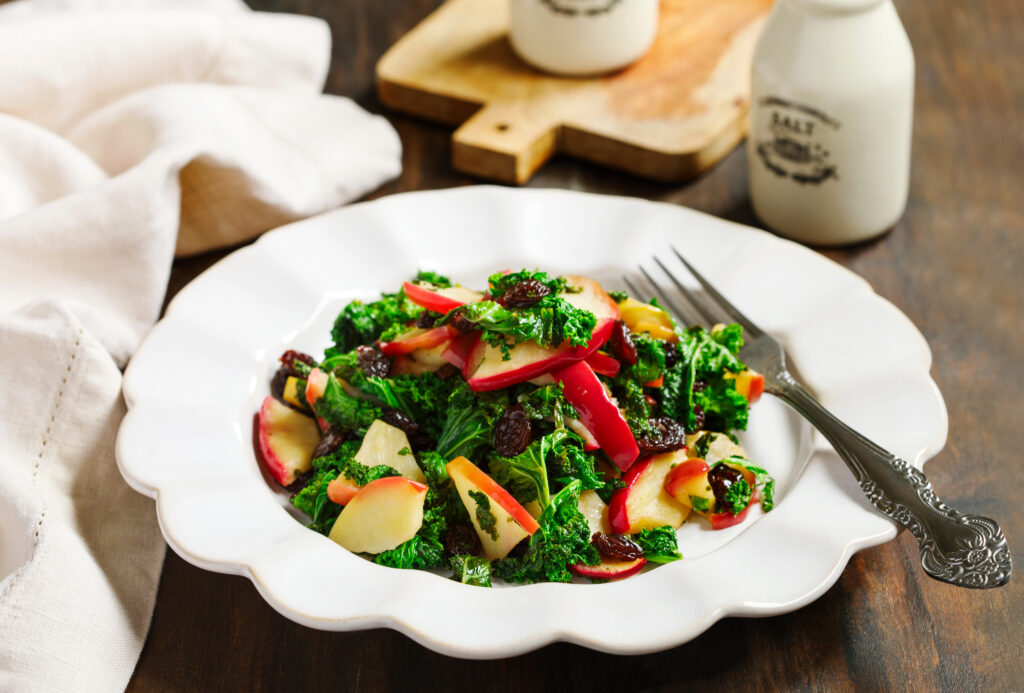
The first time I saw fresh fennel, I was like, “What is this crazy, pokey, hairy thing? It looks a bit like Wilson from Castaway!” But I dove in, chopped off some of the weirder bits and tried a bite. Very crunchy, somewhat anise-y, fresh and tasty. It has many health benefits, so I suggest incorporating it into your diet! Though this recipe uses raw fennel, roasted fennel is also amazingly delicious, as it becomes more sweet and carmelized as it roasts.
Salad Ingredients:
1 large bunch of kale – washed and chopped into bite size pieces (you need to remove the leafy bits from the spine of each leaf, and then chop)
1 large apple – sliced thin
1 large bulb of fennel – sliced thin, preferably on the bias
small handful of raisins
small handful of pumpkin seeds (toasted optional)
Dressing Ingredients:
1/4 cup olive oil
1 teaspoon of lemon zest
2 tablespoons of lemon juice
1 tablespoon of maple syrup or honey
2 teaspoons of Dijon mustard
salt and fresh ground pepper to taste
Before you make the kale salad, you have to prepare the kale. It literally needs some massaging. Once I have it all chopped up, soaked, washed and dried, then I put it in a big bowl, sprinkle a bit of lemon juice or salt over it and massage it with my fingers. Give it a good squeeze, the kale can handle it. You can feel it begin to yield and soften. This makes it so much more tender for eating in your salad. Then, let the kale sit while you prepare the other ingredients.
Slice the apples and fennel nice and thin, and add them and the raisins to the kale bowl. If you want to toast your pumpkin seeds, place them in a medium hot skillet and move them around constantly until they start to release their fragrance and pop. Let them cool before adding to the salad. You can also add them in raw, without toasting, to save a step.
To make the dressing, combine all of the ingredients, whisk together or shake in a covered container until emulsified. Add to the salad (this makes a lot of dressing, so you might not need all of it), and I like to massage it in a bit more to really get the kale to absorb the dressing. Or maybe I just like getting my hands dirty.
Then, enjoy!
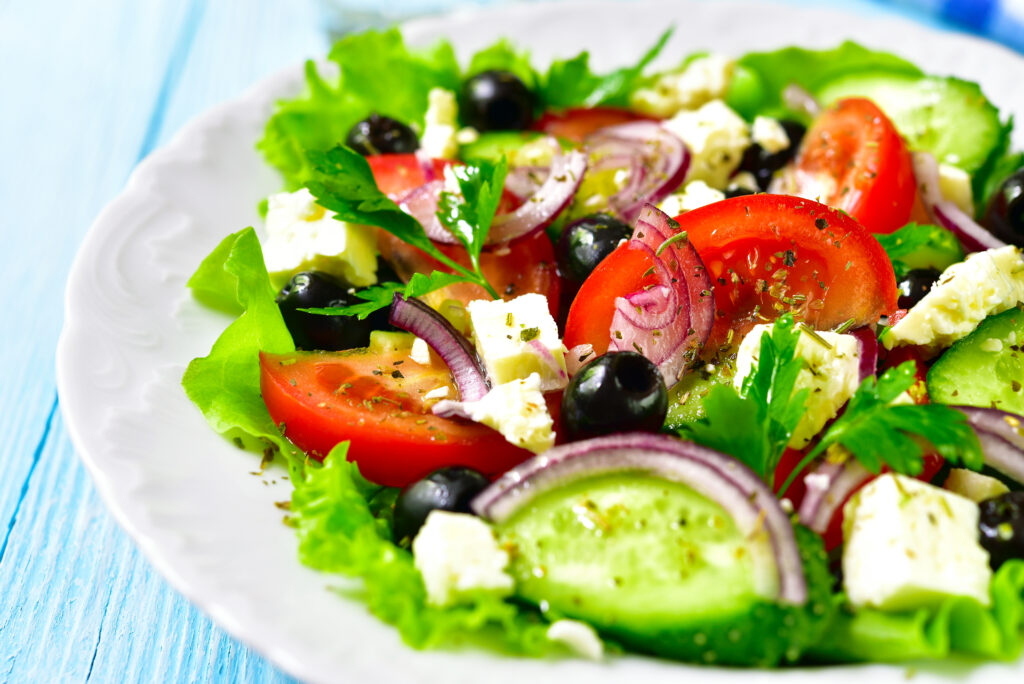
Escape to Greece Greek Salad
I love a Greek Salad. So delicious and satisfying. When I traveled to Greece, over 20 years ago, I lived off of this salad. Each restaurant had a slightly different spin on it, but the creamy feta and briny olives, sweet tomatoes and crunchy cucumbers, dressed with olive oil and lemon juice, was simplicity at its best. Honestly, you don’t need a formal recipe for this, though I do love the one I’m sharing today. It is a slightly more dressed up Greek Salad, with plenty of fresh herbs. It has the desired effect of taking me away, at least with my taste buds, to those gorgeous islands, where I fell in love with the most perfectly delicious tomatoes I’ve ever eaten.
If you are ready to escape to Greece, maybe give this recipe a try!
Vinaigrette
3 tablespoons red wine vinegar
2 teaspoons minced fresh oregano
1 1/2 teaspoons fresh lemon juice
1 garlic clove, minced
1/2 teaspoon salt
1/8 teaspoon fresh cracked pepper
6 tablespoons olive oil (use the good stuff!)
Salad
1 large cucumber, or 3 small cucumbers, halved and sliced
1/2 red onion, thinly sliced
2 heads of romaine, chopped or torn into bite size pieces
3 tomatoes, cored, seeded and cut into wedges
1/4 cup fresh parsley leaves, chopped roughly or torn
1/4 cup fresh mint leaves, chopped roughly or torn
20 kalamata olives, pitted, quartered lengthwise
1 cup feta cheese, crumbled
Whisk the vinegar, oregano, lemon juice, garlic, salt and pepper together in a large bowl. Whisking constantly, slowly drizzle in the olive oil.
Stir in the cucumber and onion into the vinaigrette and let it stand while you prepare the rest of the vegetables. Add the lettuce, tomatoes and herbs, and toss gently to coat.
Transfer the salad to a large Mediterranean serving platter and sprinkle with the olives and feta.
Kick your shoes off, sit in the sun with a large sun hat, and enjoy your salad, imagining the sounds of the sea and surf.
Mains
Endless Summer Chicken Satay with Tehina
For me, summer equals lots of barbeques! I get tired of the usual offerings and I really like this simple recipe to offset all the hot dogs, burgers and typical bbq chicken I see. Also, instead of peanuts, we are tapping into the Middle-Eastern deliciousness of Tehina (tehini) that is a staple in my house.
Enjoy with a crunchy slaw and maybe some brown rice for a complete meal.

This recipe is adapted from Aviva Romm’s Satay Chicken in The Adrenal Thyroid Revolution.
1 lb Boneless, skinless chicken breasts, cut crosswise into 2 inch pieces
Skewers (if using wood, soak for 10-20 minutes first)
For the marinade:
1/4 cup fresh lime juice
1 tbsp soy sauce or tamari
1 tbsp minced fresh ginger
1/2 tsp red pepper chili flakes
4 garlic cloves, minced
1 tsp honey or maple syrup
For the tehina:
1/4 cup tehina/tehini paste
salt to taste
squeeze of lemon or more to taste
1/4 tsp garlic powder or for a spicier punch, 1 fresh garlic clove, crushed in a press
water to desired thickness, about 1/4-1/2 cup of water
Whisk all the marinade ingredients together and pour over the chicken, stirring to coat. Cover and marinade in the fridge for 1-3 hours.
Skewer the chicken and grill for 4-5 minutes on each side. (Alternatively, saute the chicken in a couple tablespoons of coconut oil, instead of skewering it).
Meanwhile, prepare your tehina. Place the tehina paste in a medium bowl, slowly adding water and stirring rapidly until the tehina reaches your desired creaminess. Then add your seasonings to taste.
Remove the chicken from the skewers, place on a bed of cooked brown rice or on top of a crunchy slaw (or both!) and drizzle generously with tehina.
Enjoy the bright and interesting flavors, as well as the satisfying balance of the tehina!
Mung Bean and Spinach Coconut Curry
“Beans, beans are good for your heart…”
Though so many beans come with digestive consequences, mung beans are less likely to cause flatulence and are more easily digested than other legumes. Good news! So, we can safely enjoy the heart healthy benefits of the mung bean in this recipe. Get an extra serving of your leafy greens with spinach, boost your immunity with garlic, and enjoy the satisfying, filling comfort of coconut milk, making this a delicious winter curry.

4 Tbsp coconut oil
1 Tbsp cumin
9 cloves of garlic, minced
28 oz/800 gram can crushed tomatoes
2 Tbsp ginger, minced
2 Tbsp ground coriander
1 1/2 tsp turmeric
1 tsp salt
1/4 tsp cayenne
4 cups water
1 cup mung beans, well rinsed and checked for stones
500 ml coconut milk
300 grams fresh or frozen spinach
1 lime, juiced
1/4 cup fresh cilantro, chopped
In a large pot, heat the coconut oil over medium high heat. Add the cumin and cook briefly (less than a minute), just until it darkens. Add the garlic and saute for a couple minutes until it has browned…being careful it doesn’t burn.
Add the crushed tomatoes, ginger, coriander, turmeric, salt and cayenne, and stir well to combine. Although this cook for about 5 minutes.
Next, add the water and the mung beans. Bring to a boil, then reduce the heat to low, cover and simmer for about 30 minutes or until the mung beans are cooked and softened.
Stir in the coconut milk and spinach, raising the heat again to about medium-high. If your spinach is frozen you will need to let it defrost and cook for several minutes. If your spinach is fresh, it will only take about a minute to cook.
Remove from heat and add the lime juice and cilantro.
Serve this hot with a side of brown rice for a satisfying meal.
Sides
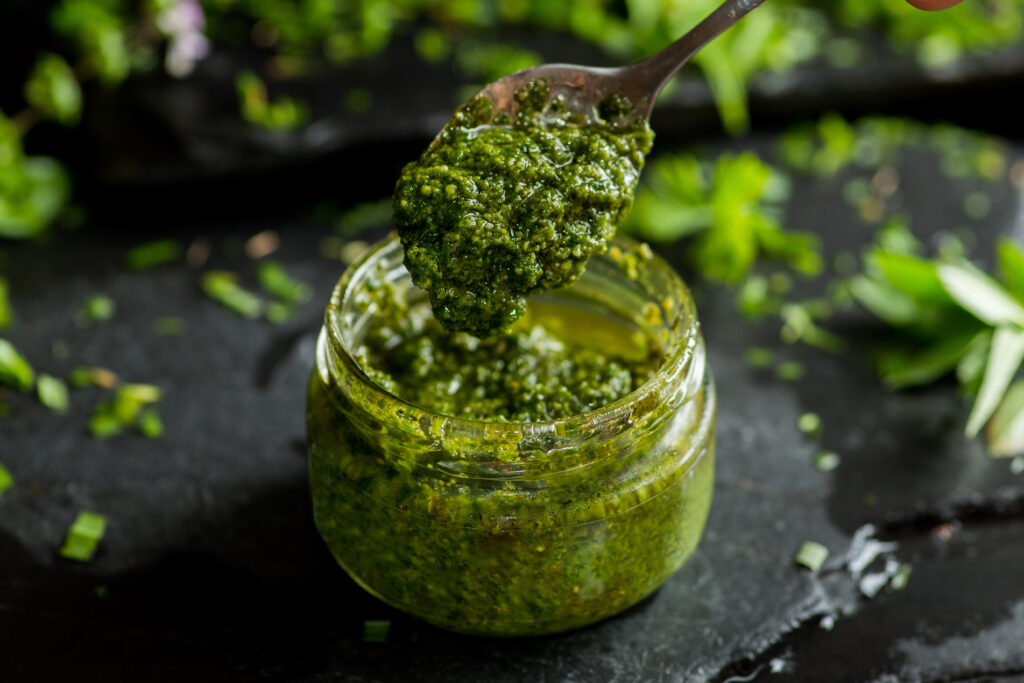
Winter Pesto
Oooooh Pesto! Creamy, savory and oh so satisfying! I can eat it year-round, but the truth is, basil is grown seasonally in the summer. Of course, in today’s supermarkets, you can get just about anything at any time of year, but basil needs lots of hours of sunshine, which for most of us doesn’t happen in the winter months.
Never fear, I have a great winter pesto that I discovered several years ago, and I love making it to get my pesto fix whether basil is available or not! This recipe makes use of cold-hardy parsley and walnuts (rather than pine nuts, just to change it up) and is sooo delicious.
I add it to pasta, dip raw veggies in it, make pesto sandwiches, slather it on a cracker, or serve it with some delicious roasted root vegetables. I even find the kids scooping it out of the container by the spoonful and sneaking bites! It never lasts long in our household, but that’s okay, being so quick and easy to make, it’s simply part of our weekly menu routine.
I hope you enjoy this as much as I do! (just check your teeth after enjoying and have some floss handy ;0))
1-2 large bunches of parsley, well washed, ends trimmed
1-2 cloves of garlic, peeled*
1/4-1/2 cup of olive oil
1/4 cup of raw, shelled walnuts
1/2-1 teaspoon sea salt or to taste
1/2 teaspoon ground pepper
I make pesto with my stick immersion blender. It came with a cylinder container that works great for this recipe, but you can use any narrow, deep bowl.
Add one large bunch of parsley, garlic, ¼ cup of olive oil, walnuts, salt and pepper to the immersion blender container.
Begin blending and moving the stick around to incorporate all of the ingredients. Slowly begin to add in the second batch of parsley and continue blending. You may not need all of the parsley.
Continue adding more oil as necessary to get the creamy consistency you desire.
If it is too oily, add more nuts. Too dry, more oil. Test for taste.
*The 2 cloves of raw garlic make it a little zingy, so if you have milder tastes, start with just one clove of garlic. If you want to ward off vampires, go for 2-3!
I like my pesto fairly salty, pungent and concentrated, but when I add it to pasta dishes, I soften it with a bit of cooking cream. When eating it as a spread, a little goes a long way.
Acorn Squash Halves with Goat Cheese and Maple Pecans
Oh the beauty of squash in the fall! Butternut, Acorn, you name it! They are so simple and delicious, roasted with just a bit of olive oil; they are yummy by themselves. However, this recipe gets a bit fancier with some cheese and nuts. But feel free to roast the squash halves and enjoy as is, if you are dairy-free, or just in a hurry. Serves 6.

3 Acorn Squash, scrubbed and halved (you may also want to chop off the ends so they can sit nicely on your plate)
Olive oil
Goat cheese to taste (Feta or creamy rounds, if you prefer a smoother flavor)
1/2 cup Pecan halves
1 Tbls Maple Syrup
Sprinkling of Sea Salt
Preheat your oven to 350F (180C). Meanwhile, prepare your squash halves. You need a very sharp knife to do this, be careful! This skin is hard. Once halved, scoop out the seeds and any slimy bits in the center. Prepare a baking sheet with baking paper.
Pour a small amount of olive oil into your hands and rub the exposed squash flesh with oil. Once all of the squash is oiled up, place face down on the baking sheet and pop them into the oven for about 35-45 minutes. When the skin begins to soften and wrinkle, they should be done. You can test with a fork to make sure they are tender enough – you should easily be able to pierce it.
While the squash are roasting, prepare your pecans. Heat a dry frying pan on medium heat. When it is hot, add your pecans to the pan and shake or stir constantly. Within seconds they will begin to emit a warm, nutty scent. Add the maple syrup to the hot pan and keep stirring to coat. Quickly sprinkle in the sea salt and remove from the heat immediately. I like to put the finished nuts on a sheet of baking paper to cool. Don’t keep them in the hot pan. They should be delicously sweet and salty.
When your acorn squash are ready, crumble some cheese into the little bowls of the squash, and toss a few of your nuts on top.
Enjoy the goodness of fall with this simple dish.
Desserts
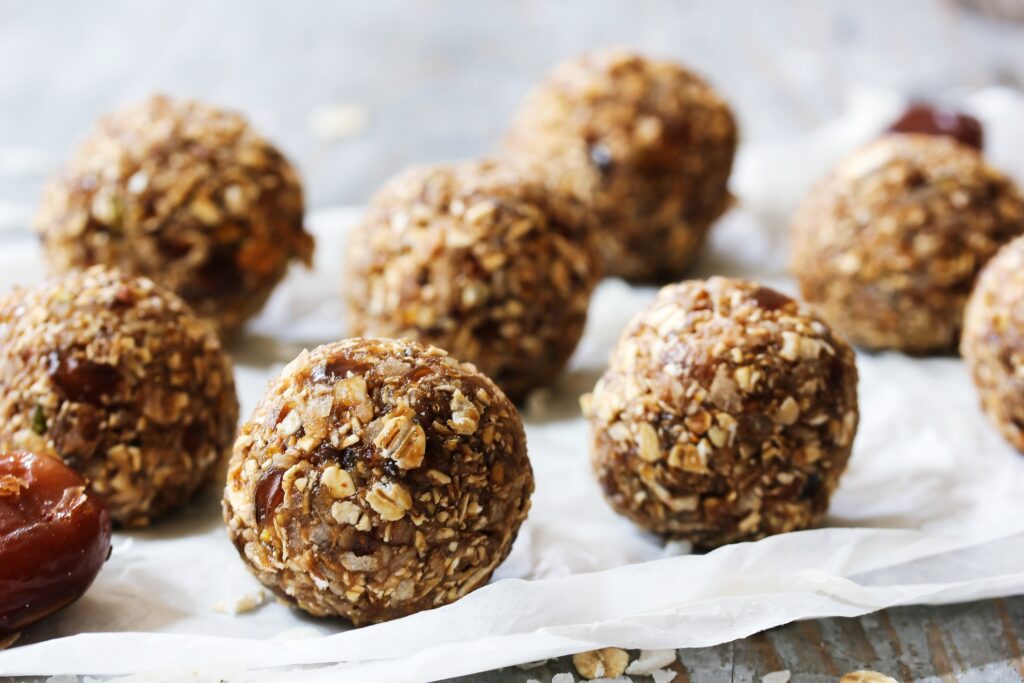
Women’s Energy Bites
My dear friend Dari brought me the most delicious cookies ever and included the recipe after my eldest son was born in 2009. Our friendship had developed over the course of our pregnancies (she was pregnant at the same time with her son) and we shared quite a few laughs, compared notes and commiserated about being 9 months pregnant in July.
I gave birth first, and I’ve always been grateful because that meant she wasn’t too busy with her own baby to bring me these yummy cookies!
As she explained to me, they provide a much needed power boost to an exhausted, nursing mom when she absolutely can’t find the time, energy, or two hands to make a proper meal or snack. But she needs the energy to keep going.
I’ve made them for my friends and loved ones over the years, and not just after birth. For any difficult transition, particularly when you need a little chocolately love, these nourish and satisfy.
Dari’s original recipe contains a delicious dose of ground flaxseeds. This is the most absorbent way to consume flax. I’ve added an additional scoop of whole flaxseeds however, which boosts the overall fiber content and can contribute to a better gut. Flaxseeds have tons of fiber, lignans and omega-3s, giving you a phytoestrogen* boost that makes these cookies a hormone balancing treat!
Though I’ve modified her original recipe and proportions to suit my tastes over the years, the essence of its nurturing love persists, and dear Dari gets the credit for all the joy they bring.
Makes about 3 dozen
1 1/4 cups of rolled oats
1 cup of chopped almonds, walnuts, pecans, or other nuts (you can use one type or a combination)
1 cup dried coconut flakes
1 cup of raisins
1/2 cup of dark chocolate chips
1/4 cup of freshly ground flaxseeds (I use my coffee grinder for this purpose… ground flaxseeds that you purchase in a store usually have lost their potency already, so it’s best to fresh grind if you can).
1/4 cup of whole flaxseeds
1/4 cup of sugar or molasses (if you are off sugar, good for you! These are still tasty without the sugar, but add 2 tbsp. of almond or other nut butter)
3 eggs
3 heaping tbsp. of coconut oil softened at room temperature
2 tbsp. of vanilla extract
Preheat oven to 350F/180C
Combine all of the ingredients in one bowl. Allow the “dough” to sit for about 10 minutes (I use this time to clean up my ingredients). Wet your hands and form round balls using about 2 tbsp. of dough per ball. Place on a cookie sheet lined with baking paper. Bake at 350F/180C for 20-25 minutes or until golden brown. Enjoy them yourself, or share with those special women in your life that just might need a pick-me-up. 💜
*Phytoestrogens are plant (phyto) estrogens. Flaxseeds contain the highest level of lignans of all foods. Lignans are a type of polyphenols, which are high in phytoestrogens. These are naturally occuring and actually work as an adaptogen (a natural substance that helps your body adapt to stress), helping your body to BALANCE the amount of estrogen you have. So, if you are estrogen dominant, the flaxseeds help your gut to process out the excess estrogen. If you are needing some more estrogen, especially if you are perimenopausal or menopausal, the use of flaxseeds can gently raise your estrogen. Don’t be scared off by the word estrogen-it is the synthenic estrogens in our environment that are particularly harmful, but these delicious phytoestrogens are good for you – be sure to do your research!
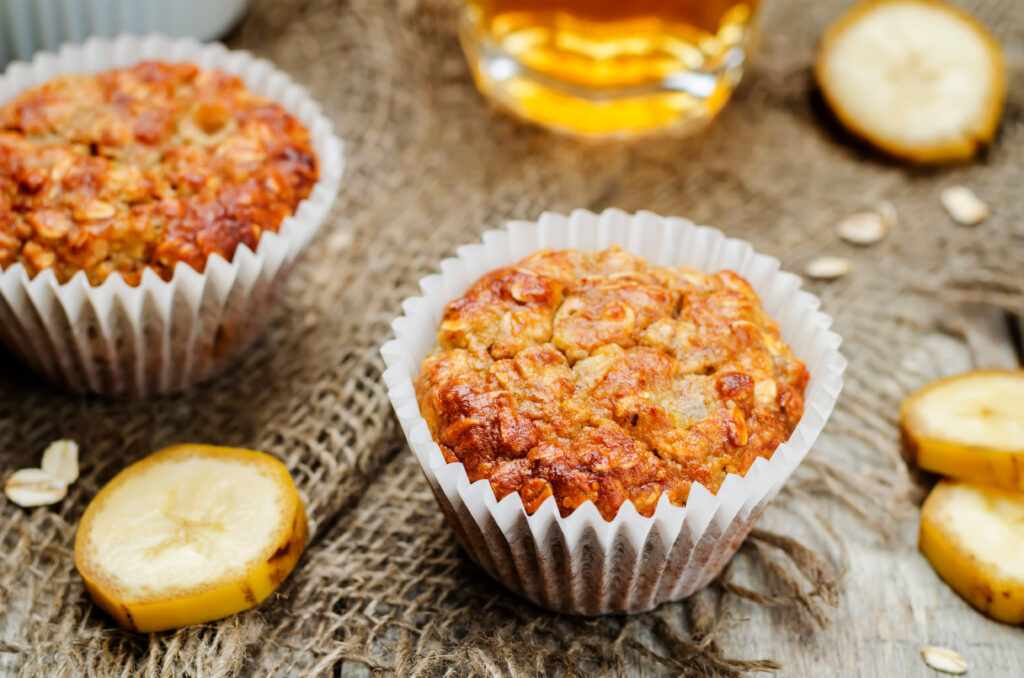
Flax and Oat Morning Sunshine Muffins
I’ve been making these muffins for many years, and though they are very brown and dense, they satisfy me when I need an on-the-go breakfast or snack. They are very quick and easy to make, and I usually have everything in my pantry. Also, feel free to get creative with add-ins- chopped nuts, raisins, chocolate, etc…just add them in at the end!
2 ripened bananas
4 tsp. olive oil
2 large eggs
1/3 cup brown sugar
1 cup freshly ground flax seed
1/2 cup whole wheat flour
1 cup oats
1 tsp. baking soda
Preheat the oven to 350 degrees F/180 degrees C and line a dozen muffin tins with paper.
Mash the bananas in a medium mixing bowl. Beat in the oil, egg and brown sugar. Grind the cup of flax (I use a coffee bean grinder) until fine. Add ground flax, flour, oats and baking soda to the wet ingredients and stir. Don’t over mix. If you have any add-ins – now’s the time to incorporate them.
Spoon into the muffins tins and bake for 15-20 minutes. Enjoy them warm as they shout to you, “Good Morning, Sunshine!”